Home » Plumbing
Category Archives: Plumbing
A Close Look at the Work and Duties of Plumbers
Plumbing systems run unseen throughout our homes and businesses, transporting water and sewage to and from fixtures like sinks, toilets, showers, and appliances. Plumbers Bradenton install, repair, and maintain these vital piping systems.

They interpret blueprints and building regulations, work closely with architects and construction teams, and troubleshoot issues such as leaks and clogs.
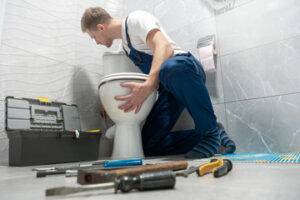
Plumbing systems are intricate networks that carry freshwater, waste water, and steam throughout homes and businesses. These systems take away sewage, provide hot and cold water, and regulate indoor climate through pipes, valves, and fixtures like taps, toilets, and sinks. Plumbers install, repair, and maintain these systems to ensure they work properly. This can include laying pipes, setting toilets and sinks, installing showers and bathtubs, connecting appliances like dishwashers and washing machines, and more. Plumbers also use specialised tools to identify and fix issues with existing pipes, fixtures, and appliances.
A day in the life of a plumber often starts with responding to emergency calls from customers. These can be due to leaks, overflowing drains, or backed-up sewer systems that require immediate attention. Plumbers will assess the situation and determine the best course of action to take to rectify it. This may involve repairing or replacing parts, testing for gas leaks, or clearing blocked drains. They will then follow up with the customer to make sure the problem is resolved.
As a skilled tradesperson, plumbers are required to undergo training and apprenticeships to acquire the necessary knowledge and skills for their job. They must be licensed in their area to perform plumbing work, and this typically requires passing an exam that tests their knowledge of local codes and regulations. Plumbers who are experts in specific areas of plumbing can also become certified to demonstrate their competence.
There are many different types of plumbing systems, each with its own set of specialised requirements. For example, natural gas plumbing is a specialist field that requires training and certification to understand how to safely install and connect gas lines to stoves, heaters, and other appliances. Additionally, there are several different types of water heating systems, each with its own set of benefits and drawbacks. Plumbers who specialize in water heating can help customers choose the right system for their home and install, repair, and maintain it.
Because of the specialised nature of plumbing systems, it’s important for plumbers to have strong analytical and problem-solving skills. They must be able to interpret blueprints and construction plans in order to install plumbing components correctly, and they must also be able to detect and troubleshoot issues with existing systems.
Maintenance
A plumbing system provides water, removes waste and regulates indoor climate through pipes, valves, fixtures and fittings. It is essential to the comfort and safety of a home or business, yet it is often taken for granted until something goes wrong. Plumbers install new plumbing systems in homes and businesses, as well as repair and maintain existing ones. The work can be physically demanding, as plumbers often spend long periods of time on their feet or working in cramped spaces. Many plumbers also need to use hand tools and heavy machinery.
Plumbers are responsible for the installation of piping and fixtures, including bathtubs, sinks, toilets, showers, washing machines and dishwashers. They work from blueprints and building plans to determine the layout of piping and appliances, and they follow local plumbing codes to ensure all components are connected properly. In addition, they may install gas lines for cooking and heating.
When it comes to maintenance, plumbers are the go-to experts for fixing leaky faucets, toilets and water heaters. They can also help prevent costly issues by performing regular inspections and cleaning drains. For those with a more in-depth knowledge of plumbing, they can even make repairs to complex heating systems and water meters.
While many people only think about their plumbing when they have a problem, good plumbers can keep the system in good condition and avoid expensive repairs down the line. This is why more and more people are choosing to sign up for plumbing service contracts.
Plumbers are also on-call to deal with emergency situations, such as burst pipes, sewage backups and flooding. They need to be able to diagnose the issue quickly and come up with a solution as efficiently as possible to minimize disruption to customers’ daily lives. This requires strong troubleshooting skills, as well as the ability to effectively communicate with customers. For this reason, plumbers often work late hours or on weekends.
Repair
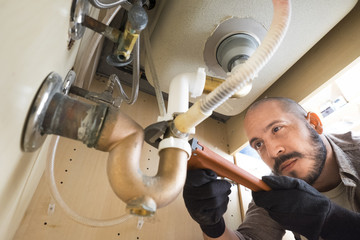
There are a wide range of repair services that plumbers offer. They can fix leaky faucets, unclog drains and toilets, install water heaters and other appliances, and inspect plumbing systems to identify problems and determine the best solutions. Plumbers are also trained to use advanced tools and techniques to repair pipes without tearing them out and replacing them, such as pipe relining and trenchless technology.
Leaks are a common problem that plumbers deal with on a regular basis. Homeowners can often patch leaks themselves using a kit, but plumbers can make sure the repairs are permanent. If left untreated, leaks can cause serious damage to the house and lead to costly repairs.
Clogged drains are another common issue that plumbers deal with on a daily basis. These can be caused by a variety of things, including food scraps, hair, paper products, and more. While some clogs can be cleared with at-home remedies, such as plungers and drain cleaners, others may require more invasive methods, like hydro jetting or sewer line cleaning.
Plumbing companies also regularly clean out septic tanks and sewer lines, something that is vital for the health of the home. Sewage systems can be a breeding ground for dangerous bacteria, including cholera, typhoid, hepatitis, and more, so it is important that these systems are cleaned out on a regular basis. Plumbers can also inspect the system for issues, such as rusty or damaged fixtures.
Plumbers can also help with kitchen and bathroom remodeling projects. They can install new sinks, bathtubs, showers, and faucets, as well as replace old ones. In addition, they can install kitchen and bathroom appliances, such as dishwashers and water heaters.
One of the most valuable services that plumbers provide is emergency services. They can respond to calls about leaking pipes, toilets that won’t flush, and other urgent matters quickly and efficiently. This can give homeowners peace of mind knowing that a skilled professional is on the way to help solve the problem. In addition to providing fast response times, these professionals can also advise homeowners about how to prevent the problem from occurring in the future.
Commercial and Industrial
The work plumbers do varies widely, depending on the type of property and its plumbing needs. For example, industrial plumbing services encompass waste removal and water supply systems for large buildings such as manufacturing plants or office complexes. In contrast, residential plumbing covers the installation and maintenance of pipes and fixtures in homes. This can include everything from clogged drains to installing sophisticated kitchen faucets and water-efficient toilets.
Commercial and industrial plumbers must be knowledgeable about building codes and regulations that differ from those governing residential properties. Additionally, because these spaces serve a greater number of people than residential properties, they must adhere to stricter hygiene requirements. This includes sanitizing all surfaces after each use and maintaining proper air pressure to prevent the buildup of mold and other contaminants.
A commercial plumber may also be responsible for the installation and maintenance of plumbing systems in retail outlets, restaurants, office buildings, and other large spaces. These types of jobs require a high level of skill because they often involve working with larger, more complicated plumbing equipment. Additionally, commercial spaces tend to have more extensive plumbing networks than residential ones because they are designed to accommodate a higher volume of people.
Whether working on a small retail space or a massive manufacturing plant, these plumbers must be able to identify and resolve issues quickly and efficiently to keep production running smoothly. They may also be required to perform a wide range of other tasks, including testing for hazardous materials, ensuring all plumbing components comply with health and safety regulations, and inspecting and repairing heating and cooling units.
Plumbing is an essential service for all homeowners, and the responsibilities of these professionals vary greatly depending on the type of property in question. From resolving minor issues like clogged drains to installing innovative bathroom fixtures and eco-friendly water heaters, there is no job too big or too small for a skilled plumber. By understanding the differences between residential and commercial plumbing, you can feel confident in selecting the right professional for your next project.
What Does a Plumber Do?
Plumbers are responsible for installing, repairing and maintaining pipes and fixtures that deliver potable water and remove waste. They also collaborate with other professionals, such as construction teams and architects, to ensure plumbing systems are seamlessly integrated into building projects and meet required standards and regulations.

If you enjoy working with your hands and problem-solving, plumbing may be the perfect career choice for you. Learn more about the perks of becoming Plumbers Lexington.
The plumbing system in a home or business is essential for water distribution and waste removal, which means that it needs to work properly at all times. Plumbers install, repair, and maintain these systems, ensuring that they are functioning correctly and efficiently. They also ensure that the pipes and fixtures are safe, preventing leaks and other issues that can lead to costly repairs.
Plumbers usually begin their career with an apprenticeship, where they learn the trade through on-the-job training and classroom studies under a licensed journeyperson Plumber. Then, they can apply their skills and knowledge on the job, completing tasks such as installing new plumbing pipes and fixtures, fixing clogged drains, repairing water heaters, and ensuring that all work meets safety standards.
The specific duties of a plumber can vary widely depending on the type of project, but some of the most common tasks include inspecting existing pipework to identify any problems; testing for water pressure levels and locating blockages; fitting replacement parts such as faucets and valves; removing old sealants from baths and sinks; and carrying out gas line maintenance. Plumbers also need to be able to interpret blueprints and building codes in order to plan and execute plumbing installations.
Because the plumbing industry is always evolving and improving, plumbers need to keep their skills current. This is why many plumbers choose to take continuing education courses and attend trade conferences to learn about new technologies, equipment, and best practices. Having strong interpersonal communication skills is also crucial for this role, as plumbers often interact with customers and clients.
Plumbers have a unique and important role in our daily lives, and it’s important to understand the work that they do. If you’re interested in learning more about the role of a plumber, or if you’re considering becoming one yourself, be sure to check out this comprehensive guide to getting started in the plumbing trade.
Repairing the Cylinder
Plumbers install and repair water systems in homes, businesses and other commercial settings. Their work ensures that plumbing fixtures and appliances function properly, allowing for clean water supply, adequate drainage and the safe use of gas. They also ensure that plumbing meets building codes and regulations. Plumbers often collaborate with other professionals, such as carpenters and electricians, to ensure that plumbing is integrated seamlessly into construction projects and meets all necessary requirements.
Plumber duties and responsibilities may vary depending on the job type, but they generally involve inspecting existing pipework, testing pressure levels and identifying any problems. They may also advise customers on how to maintain their plumbing and help them select replacement parts. Other responsibilities may include installing new taps, toilets and waste disposal units, connecting water heaters to the main supply and repairing or replacing damaged pipework. Plumbers can also be called in to inspect and repair gas lines and appliances.
To perform their duties, plumbers must be knowledgeable of a wide range of tools and equipment. They must be able to use hand tools, such as wrenches and pipe cutters, as well as power tools and soldering equipment. They must be able to read blueprints and understand how to install plumbing systems according to specifications. They must also be able to identify and troubleshoot issues, such as a leaky valve or broken faucet, and come up with effective solutions.
Customer service skills are important for plumbers to have, as they often work directly with clients. They need to be able to explain plumbing issues clearly and answer questions, while also advising customers on how to avoid future problems.
The physical demands of the job can be significant, as plumbers spend a lot of time on their feet and working in tight spaces. They must be fit and healthy to cope with these physical challenges. In addition, they may be exposed to hazardous materials and be required to adhere to strict safety protocols.
Repairing the O-Ring
The O-ring is a flexible, resilient seal that creates a tight seal on mating surfaces. It’s placed in a gland (a groove or channel cut into the surface of a part) and compressed between the two parts. This compression forces the o-ring material to deform, filling any gaps or imperfections that might otherwise leak fluids or gasses.
O-rings are generally reusable, which makes them more cost-effective than non-elastic flat gaskets or crush-type seals. Their lifespan is largely dependent on the environment in which they are used. High temperatures can speed up aging, while harsh chemicals or aggressive cleaning agents can significantly shorten their life. O-rings also require proper storage to protect them from contamination and damage from physical stress, such as friction, diffusion, adhesion or abrasion.
While o-rings are extremely versatile and work in many different environments, they are not impervious to degradation. Depending on the composition of the elastomer, it may be sensitive to heat, cold or pressure; chemical attack from acids and bases; or degradation by ultra-violet light, ionizing radiation, oxygen, carbon monoxide or other gases.
For these reasons, it’s important to keep an eye out for signs of O-ring failure and to replace the cartridge promptly when needed. The most common sign of a defective O-ring is a water leak from the faucet handle.
Replacing the O-ring is simple and typically inexpensive. It’s essential to get the new O-ring to fit properly, so it should be matched to the spout and stem end of the faucet. A small slotted screwdriver or utility knife is typically used to pry off the decorative cap on the handle, exposing the attachment screws. The handle can then be removed, and the old O-ring can be cut off with a utility knife, coated with nontoxic, heat-proof plumber’s grease and replaced.
Whenever a replacement is used, it’s good practice to take the old cartridge and any new parts with you to the hardware store or home center so that you can find an exact match for both size and length. Most leaky cartridges need a new seat washer and/or O-ring, so bring the old ones with you to help identify the problem.
Plumber Tips for Fixing Plumbing Problems in the Laundry Room
Plumbing is a skillful profession that requires a lot of training and experience. It is a trade that many people choose after completing a high school diploma program or apprenticeship and obtaining a license from the local jurisdiction.
Plumber In Glendora is responsible for installing and connecting pipes, fixtures, and appliances. They also inspect their work for compliance with building codes and regulations. They need good customer service skills because they interact with clients regularly.
The washer on the faucet seat, or valve stem, wears out and needs to be replaced. A plumber can dress it using a seat-dressing tool, which has square and hexagonal heads to fit most faucets. You can also replace the washer, but this requires removing the stem from the counter top, so it’s not usually practical unless you have easy access to the area beneath the sink. Coat new washers with plumber’s grease to help them last longer.
Remove the Stem
When installing a new stem, use caution when threading it on the bar to avoid damaging the steerer tube or the seat post. A wrench is recommended for this step to help you grip the stem securely and apply even pressure.
Once the new stem is installed, reinstall the face plate and tighten the bolts in an X pattern. Some stems require a certain amount of insertion before they will begin to rotate freely in the quill. Consult the manufacturer’s documentation for this information.
An experienced plumber can help you install or replace a faucet stem. However, doing it yourself can save you money and gives you the satisfaction of a successful DIY project. You can also prevent costly repairs by repairing or replacing a faulty faucet stem before it becomes damaged.
Remove the Packing Nut
Often the culprit of leaky shutoff valves is loosening of the packing nut, which seals around the stem. If you turn off the water using the appropriate shut-off valve and tighten this large flat nut slightly (with a wrench) with some penetrating oil like Liquid Wrench, you may be able to stop the leak.
However, be sure to apply gentle even pressure, never brute force or a sudden burst of power. This simple repair usually takes just a few minutes from start to finish and is a satisfying little fix for plumbers.
If this doesn’t stop the leak, you will likely need to replace the packing material. This is easily done with readily available Teflon wrapping material that comes in stringlike form. The new packing material is wrapped around the stem, then the packing nut is tightened.
Remove the Screw
Corroded screws and screw heads that are stripped can be difficult to remove. You can use Kroil or another penetrating oil to loosen them. Alternatively, you can also drill past the head of the screw with the next size up bit. The screw should then easily pull out. You may need to repeat this step if the screw is really stuck or rusted in place. This is a quick and easy task that most plumbers can do for you, but you can do it yourself in only a few minutes.
Replace the Washer
If your washer is leaking, you may be in need of a plumber. In the laundry room, leaks can lead to water pooling on the floor, which can cause paint flaking, mildew, and other damage. If this occurs, it’s important to act quickly.
If you’re in need of a plumbing repair, turn off the water supply to the sink (there should be an isolation valve underneath the faucet). Then, undo the handle and remove the washer.
While CR members completed 53 percent of their washing machine repairs themselves, we don’t recommend trying to fix a washer yourself unless you’re quite handy and the problem is minor, like replacing a button or cleaning a filter. A major problem could require a new motor, and that can be expensive. Also, if your washer is older and you’re doing multiple loads of laundry each day, it may be more cost-effective to buy a new one.
Replace the Seat Washer
The washer on the valve seat that the stem pushes against can wear out and not provide a tight seal, leading to leaks. Replacing the washer should stop the drips. If it doesn’t, the seat itself may be corroded or pitted and will need to be replaced. Some faucet seats are replaceable; others can be “dressed” by grinding them down with a special tool to provide a new surface for the washer to seal on.
A round, recessed washer sits beneath the stem and is held in place by a flat, domed retainer ring that’s typically attached to the handle. Examine both of these to ensure they are intact. Coat the retainer ring and the new washer with nontoxic plumber’s grease to make sure they don’t leak.
Replace the Stem
After shutting off the water and removing the handle, remove the old stem. You should be able to unscrew it with the Allen wrench or Phillips-head screwdriver and set it aside. You may have a decorative cap covering the valve stem assembly screw; remove this with a flat-head screwdriver or edge of utility knife and screw it off. Replace the valve stem with a new one of the same size and coat it with food-safe plumber’s grease.
If your new stem has a different stack height from the old one, you will need to rearrange the spacers on top of the steerer tube to match. This is not a safety issue but it will affect your comfort and control. It’s important that your bicycle fit is comfortable and appropriate for you!
Replace the Packing Nut
A professional plumber may use a different name for this nut (often called a stuffing nut) but the function is the same. If this is the source of your faucet leak it will need to be replaced. Again, be sure to turn off the water before working on this part of the faucet. Use a wrench appropriately sized for this tight nut, and only turn it a few turns to start with. Never over-tighten this nut!
This is a quick and easy repair that will stop drips, in most cases. In fact, it is the first step many homeowners will take before calling a plumber. It’s a little tricky because you must have the proper tools and the right touch but it is something almost anyone can do. Just be sure to shut off the water to the valve until you finish this job!
Replace the Screw
Generally, plumbers use their skills to maintain plumbing systems that facilitate water, gas and waste removal in residential and commercial buildings. They often work with architects and construction teams to design plumbing infrastructure for new building projects, and they can also troubleshoot existing systems to repair leaks or other problems.
Plumbers must have excellent analytical and problem-solving abilities to effectively assess and remedy issues. They must also have a strong mechanical aptitude and understand the science behind water flow to make informed decisions when working with pipes, fixtures and appliances.
To become a plumber, you can pursue a formal apprenticeship, which typically lasts four to five years and includes classroom instruction and paid on-the-job training. Alternatively, you can attend a vocational school or trade program to learn the basics of plumbing installation and repair. A high school diploma is usually required for both options.
The Comprehensive Job of a Plumber Explained
Plumber Topeka KS plays a crucial role in maintaining the functionality and safety of both residential and commercial buildings. They are responsible for installing, repairing, and maintaining the intricate networks of pipes and fixtures that provide essential services such as water, gas, and drainage.
Beyond these core tasks, plumbers collaborate closely with construction teams to ensure that plumbing systems are seamlessly integrated into new building projects, adhering to all local codes and regulations. This collaboration is vital for the successful completion of construction projects, ensuring that all plumbing components function correctly from the outset and contribute to the overall efficiency and safety of the building.
Many people choose to become a plumber because it’s an in-demand trade that provides good wages and career stability. There are several ways to get into this field, including completing an apprenticeship or earning a certification from a vocational school.
Liquid drain cleaners are commercial products that dissolve blockages of hair, soap scum, grease, and other debris in your home’s plumbing pipes. They usually work by creating heat inside your pipes to melt or disintegrate the clog. They are readily available at grocery stores and online. Some examples of liquid drain cleaners include Drano and Liquid Plumber.
These cleaners are typically safe for use in homes with plastic or PVC plumbing pipes, but may be damaging to older metal pipes. They are also harmful to the environment, releasing harsh chemicals into the atmosphere and groundwater supplies. Many plumbers recommend avoiding these products altogether and using natural methods to unclog your drains, such as plungers and plumbing snakes.
Some liquid drain cleaners contain high levels of sulfuric acid or hydrochloric acid, which can be dangerous to touch, and can burn your skin if it comes into contact with it. They can also corrode your pipes over time, especially if they come into contact with copper, galvanized steel, or cast iron.
Most of these liquid drain cleaners also release strong chemical fumes that can irritate your nose, eyes, and throat. Breathing these fumes over an extended period of time can damage your respiratory system, and can be especially dangerous for young children and elderly adults. Many of these cleaners are also hazardous to pets, and can be toxic if ingested.
Another option is a biological drain cleaner, which uses natural bacteria to break down organic waste in your drains and pipes. These cleaners can be used in place of liquid drain cleaners, and are much safer for your pipes. However, they may take longer to unclog your drains, and may need to be repeated more frequently than liquid drain cleaners.
If you’re having trouble with a blocked drain, it’s important to understand the problem and call a plumber for help. There are many different types of clogged drains, and each requires a unique solution. By calling a professional plumber, you can ensure that your clogged drain is safely and thoroughly cleaned, and that any other issues with your plumbing are properly diagnosed and repaired.
Chemical Drain Cleaners
Chemical drain cleaners come in powder or liquid form and are used to dissolve hair, grease, soap scum, and other organic materials that build up in the drain. They’re also effective at breaking down some types of non-organic blockages, including those caused by tree roots. However, they can be harmful to pipes if not used properly and can cause health issues if inhaled or ingested by children or pets. They also produce dangerous fumes that can irritate the eyes and inner lining of the respiratory system.
The chemicals in these cleaners may corrode pipes, especially older or fragile ones. They may also damage the surface of metal drains. For these reasons, it’s important to follow the manufacturer’s instructions carefully when using them and to always use them in conjunction with a mechanical drain cleaning tool like a plumbing snake operated by a professional plumber.
Acidic drain cleaners contain sulfuric or hydrochloric acid and work by creating a chemical reaction with the clogged material to dissolve it and make it easier to flush away. These are the harshest type of chemical drain cleaners and are generally reserved for worst-case scenarios. Caustic drain cleaners, on the other hand, are designed for more minor clogs and consist of sodium hydroxide (also known as lye) which gives off heat when it reacts with water to thin out substances like fats, oils, and greases into a water-soluble solution that can be flushed away.
Another type of chemical drain cleaner is an oxidizing cleaner. These are slightly less harsh than acidic cleaners but still cannot break down all types of clogs. Oxidizing cleaners are composed of bleach, peroxide, or nitrates and take more time to break down debris in the drain. They can, however, be effective on a wide range of organic materials such as food waste or paper products. They are also safer than acidic and caustic cleaners but should not be used frequently or on metal pipe systems as they may erode them over time.
High-Pressure Water Jets
High-pressure water jets use the force of pressurized water to clean surfaces. Unlike other cleaning methods that may include chemicals, water jetting is eco-friendly and aligns with the growing emphasis on sustainable practices. This powerful cleaning method also provides consistent results and requires minimal maintenance.
Whether you’re removing marine growth from offshore structures or de-scaling the inside of chemical storage tanks, hydro jetting can tackle almost any job. But the type of equipment used depends on the size and scale of your operation.
To create the high-pressure water jet, a pump sucks in water and accelerates it. The accelerated water then runs through the system, which includes a high-pressure hose and hand lance, to the nozzle. There, the pressure is concentrated into a narrow stream of water. The shape and intensity of the stream depends on several variables, including the pump pressure, nozzle geometry, and nozzle hole size.
Different nozzle types can produce a spray pattern that is suited to a specific application. For example, flat jet nozzles produce a wide fan-shaped spray, while point jet nozzles produce a tightly focused jet. Then there are rotating nozzles that produce several precisely focused jets with a spiral-shaped spray pattern.
A high-pressure water jet can also be used for erosion, such as cutting a metal or concrete slab. The process starts by pressurizing the clean water to 60,000/55,000 psi (4,000 bar). Then it is mixed with garnet abrasive to create an extremely narrow stream of jet that can quickly erode and remove materials.
Water jetting can also be used to cut non-metal materials, such as wood or plastic. It can also be used for etching and sandblasting. It is important to note that water jetting should not be used for cutting stainless steel or other hard, dense materials.
Water jetting is a great way to remove blockages in your plumbing. It is safer and more effective than drain snakes or chemical cleaners. It is also environmentally friendly and uses only water, so it won’t damage your pipes or the surrounding environment. However, it’s still important to use proper safety precautions and always follow the instructions of your plumber.
Sewer Jetters
A plumber uses a sewer jetter to send a blast of water rushing down the pipe, flushing away any debris that has settled along the pipe walls. This technique is highly effective and works much faster than other drain cleaners, often clearing a line in just minutes. The force of the high-pressure water can also dislodge or remove large chunks of clogged material, including tree roots and other stubborn obstructions that would be difficult for conventional drain cleaning tools to reach.
The mechanics of a sewer jetter vary between models, but all have an engine that powers a water pump to generate pressurized water in a containment tank. The water is then directed through a hose and nozzle to the pipe being cleaned. A jetter can be used in pipes ranging in size from 2 to 36 inches in diameter. The nozzle is designed to direct the water jet in a direction that will maintain propulsion even when it encounters an obstruction, so the nozzle can cut through the clog and wash it away.
To use a sewer jetter, the plumber needs to have access to both the clogged pipe and an open drain opening upstream of it. The plumber can usually access the main drain through a downhill outside drain cleanout opening, but may need to locate another open drain opening inside the house for upstream access. The plumber should also be equipped with thick, fluid-resistant work gloves and eye protection to avoid the risk of a ruptured pipe or accidental contact with raw sewage and other hazardous materials.
When choosing a sewer jetter, the plumber should pay close attention to the machine’s GPM and PSI specifications. The GPM, or gallons per minute, should be adequate to power the machine through any blockages it encounters. The PSI, or pounds per square inch, will determine how hard the machine can cut through solid masses like tree roots and other debris. A good rule of thumb is to choose a sewer jetter with a PSI of at least 3500 and a GPM of at least 150.